
What's in this market read
- What a final walk-through actually is
- When it happens and how long to allow
- What to bring, and why paper beats memory
- Check 1: The agreed repairs, item by item
- Check 2: Proof the repair work was actually done
- Check 3: Heating and cooling, switched on and running
- Check 4: Water at every fixture, and drains that clear
- Check 5: The appliances that convey, running a real cycle
- Check 6: Light fixtures, ceiling fans, and anything mounted
- Check 7: Window coverings, shelving, and the gray-area items
- Check 8: Outlets, switches, and the garage door
- Check 9: Damage from the move-out
- Check 10: Doors, windows, locks, and keys
- Check 11: The basement, attic access, and crawlspace
- Check 12: The yard, the exterior, and an empty house
- The 12 checks on one page
- Where walk-through problems most often surface
- How walk-through findings sort by severity
- What leverage you actually have at this point
- What to do when something is wrong
- The worked example: one walk-through, start to finish
- Common walk-through mistakes
- Special cases worth planning for
- What the walk-through does not cover
- The bottom line
The final walk-through is the shortest and most misunderstood appointment in a home purchase. It is usually under an hour, it happens within a day of closing, and it is the last time you stand in the property while the transaction is still a transaction rather than a completed sale. Buyers who treat it as a formality tend to walk the rooms, feel a wave of excitement, and leave. Buyers who treat it as a checklist find the one bathroom outlet that was supposed to be corrected and never was, or the dining room fixture that came off the ceiling with the seller’s moving truck.
This market note is that checklist, and it is deliberately narrow. The walk-through does not ask whether the house is a good house, whether the roof has years left, or whether you should have offered less. Those questions belonged to the inspection and the appraisal weeks earlier. The walk-through asks one question in twelve parts: is the property in the condition you agreed to buy it in, allowing for the ordinary wear of somebody living there and moving out. Everything below serves that single question.
It sits beside our home inspection checklist, which covers the earlier and far larger examination this visit is not, and our market note on what happens at a home closing, which covers the appointment that follows it. Our home buying checklist places both inside the whole purchase sequence, and our read on real estate contingencies explains the protections that are mostly behind you by this point. The companion beside this note tracks your own agreed repairs, verified repairs, and open items as you work down the list.
Key takeaways
- The walk-through is a condition check, not a second inspection. It confirms that agreed repairs were done, systems still run, conveying items are still there, and the move-out caused no damage.
- Bring paper: the contract, the repair addendum, the inspection report, and the listing photos. It is a comparison exercise, and memory is not a reliable reference for a room you last saw six weeks ago.
- Turn everything on. A visual sweep of an empty house misses the water heater that was shut off, the outlet that was never corrected, and the range that no longer heats.
- What you can actually do about a problem depends on your purchase contract, your state's forms, and what the lender and settlement agent will accept. Nothing here is a remedy you hold by right, so route it to your agent and, where appropriate, an attorney.
- Raise anything you find immediately and in writing, while you are still standing in the house. The practical difference between a problem raised before the signing and the same problem raised after it is enormous.
What a final walk-through actually is
A final walk-through is a visit granted by most residential purchase contracts that lets the buyer view the property shortly before closing to confirm its condition. It is a comparison, not an examination. You are holding two things side by side: the property as it was when you agreed to buy it, documented in the contract, the inspection report, the seller’s disclosure, and the listing photos, and the property as it stands in front of you now, after weeks of the seller continuing to live in it and then moving out of it.
That framing decides what belongs on the list and what does not. A furnace that is old belongs to the inspection. A furnace that ran at the inspection and does not run now belongs to the walk-through. A stained carpet that was stained in the listing photos is not a finding. A gouge in the hallway floor that appeared under a moving dolly is. The discipline is to keep asking what changed rather than what you would prefer.
It is also, in most transactions, a right rather than an obligation. You can decline it, and a small number of buyers do when the schedule is tight, which is close to the worst trade in the whole purchase. An hour of your time sits opposite the last moment at which a condition problem is still part of a live transaction with two motivated parties and a settlement agent holding the money. Keep the companion open as you read, and it will hold your own repair counts and open items in view.
When it happens and how long to allow
The walk-through is commonly scheduled within a day of closing, and the two most common slots are the afternoon before and the morning of. The tension in that timing is worth understanding because it is the one scheduling decision in the whole appointment that is yours. Go too early and the seller is still in the house, which means you cannot see the floors under the furniture, cannot confirm the property is empty, and cannot catch damage the move-out has not caused yet. Go too late and there is no working day left in which anything can be arranged.
Allow more time than the visit seems to need. Thirty minutes is enough to walk an empty house and feel good about it. Forty-five to sixty minutes is closer to what a real checklist takes, because running a dishwasher cycle, letting the heat come up, and testing a sample of outlets are slow, dull activities that do not compress. If the property is large, has outbuildings, or had a long repair list, allow longer.
One more piece of timing sits outside your control but inside your interest: utilities. If the seller ends service the day before closing, you can arrive at a house with no power, no water, or no gas, and a walk-through in that state confirms almost nothing. Ask your agent to confirm with the listing side that utilities will remain on through the walk-through. Our market note on how long it takes to buy a house puts this last week in the context of the whole timeline.
What to bring, and why paper beats memory
Carry four documents and a phone. The purchase contract tells you what was supposed to convey. The repair addendum, if you negotiated one, is the itemized list you are about to verify. The inspection report reminds you which systems were working and how, which matters because your standard is not perfection, it is the state of things when you agreed to buy. The listing photos are the quiet workhorse, since they are the cheapest proof that a chandelier, a set of garage shelves, or a mounted television bracket existed in the house you made an offer on.
The phone does two jobs. It photographs, and photographs taken while you are standing in the room are worth more than a description typed later. It also calls your agent, which is the correct first action for anything that is genuinely wrong. Take a charger. A dead phone at the moment you need to document something is a small, avoidable failure.
Add a few cheap tools if you want to work the list properly rather than symbolically. An outlet tester costs very little and turns guesswork about grounding into a light. A phone flashlight covers the crawlspace hatch and the back of the water heater. A note app or a printed copy of the twelve checks below keeps you from doing what almost everybody does, which is to get absorbed in one room and forget the garage entirely.
Check 1: The agreed repairs, item by item
Start here, because this is the check most likely to matter and the one most often done badly. Take the repair addendum and read it as a list, not as a memory. For each line, ask three questions: is the work done, is it done in the place the addendum described, and does it look like the kind of work the addendum called for. A line that says a licensed electrician will correct a specific outlet is not satisfied by a new cover plate.
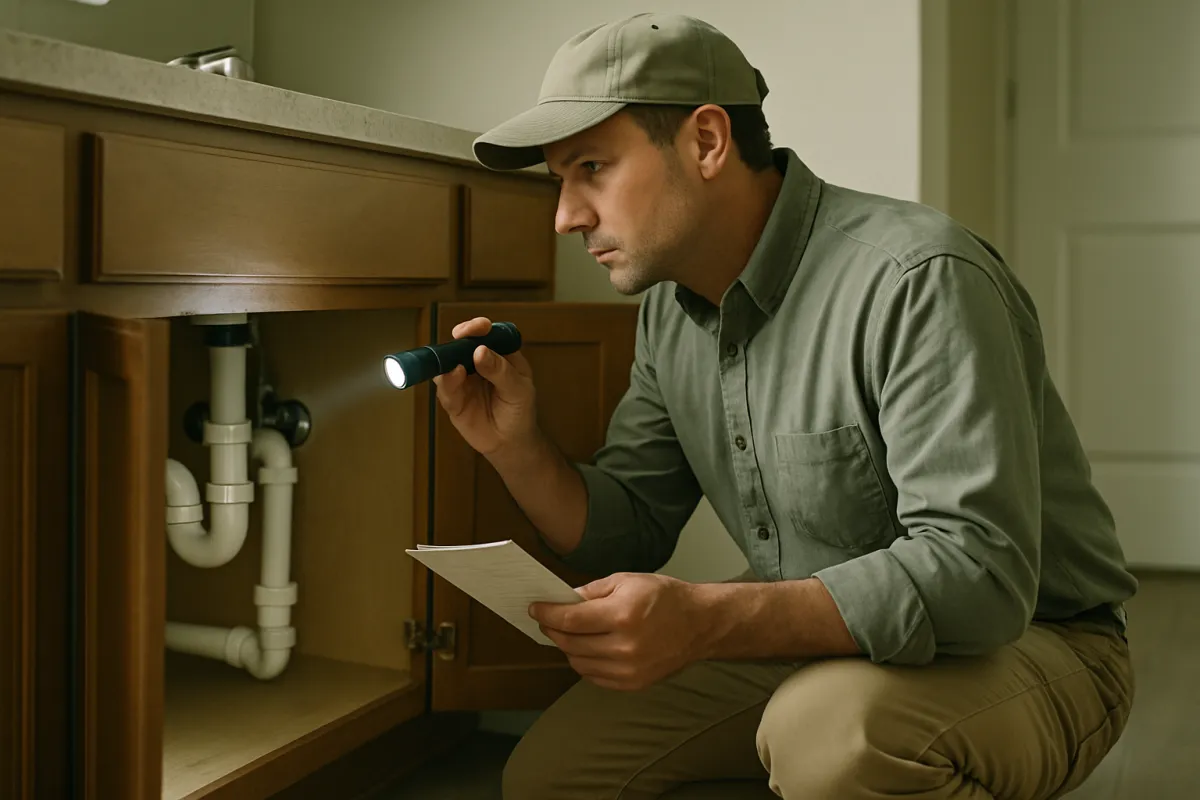
Work the list physically rather than visually. If the addendum covers an outlet, test the outlet. If it covers a leaking valve under a sink, open the cabinet and put a hand on the joint. If it covers a roof repair you cannot safely see, that is exactly the item where the documentation in the next check carries the weight instead of your eyes. Tick each line as verified, unverified, or open, and write the reason next to anything not simply verified.
On the illustrative purchase that runs through this note, the addendum has four lines. Three of them, a repaired supply valve, a corrected double-tapped breaker, and a re-secured section of gutter, verify cleanly. The fourth, ground-fault protection at a hall bathroom outlet, does not: the outlet tester reports the same condition the inspector flagged. That single unverified line is the whole point of the visit, and it is exactly the kind of finding the companion is built to track.
Check 2: Proof the repair work was actually done
Some agreed repairs cannot be confirmed by looking. Work inside a wall, on a roof, under a slab, or in a sealed system leaves nothing for you to inspect, which is why serious repair addenda often call for documentation as well as work. Ask, through your agent and before the visit, for invoices or work orders from the tradespeople who performed each item, and where the work required a permit, for evidence that the permit was pulled and any inspection signed off.
Read what arrives rather than filing it. The useful questions are simple: does the document describe the same property, the same defect, and the same scope the addendum called for, and was it performed by the type of licensed professional the addendum specified. A handwritten note that says “fixed leak” satisfies almost nothing. A work order from a licensed contractor identifying the fixture, the failure, and the correction is a real record you will still be able to find in two years.
Permit and inspection practice varies enormously by jurisdiction, and what requires a permit in one city is routine maintenance in the next, so treat this as a question for your agent and the local building department rather than a rule you can apply from a checklist. The general principle holds anywhere: for work you cannot see, the paper is the verification, and the moment to insist on it is before the signing, not after.
Check 3: Heating and cooling, switched on and running
Turn the system on early in the visit, then walk away and come back to it, because heating and cooling equipment does not prove itself in ten seconds. Set the thermostat to call for heat, listen for the system to start, then check that air is actually arriving at registers in more than one room. Where the weather allows, do the same for cooling. If the season makes one mode impractical, note that you could not test it rather than assuming it works.
Look while you listen. Obvious signs of a change since the inspection include a filter that has been removed, a disconnected duct in a basement, an unusual smell when the system starts, or a unit that short cycles on and off. You are not diagnosing the equipment, you are answering one question: does it still do what it did when the inspector ran it.
This check matters out of proportion to its difficulty because heating and cooling equipment is expensive and because a failure between inspection and closing is genuinely possible in a system that was already near the end of its service life. If it does not run, that is a real finding, and it goes to your agent immediately with a photograph of the thermostat and the equipment label. What can be done about it is a contract question covered later in this note, not something to negotiate on the spot with anyone you meet in the house.
Check 4: Water at every fixture, and drains that clear
Water is fast to test and tells you a great deal. Open every faucet in the house, including the laundry sink, the wet bar, and the exterior hose bibs, and let each one run long enough to show flow, hot water, and a drain that clears rather than backing up. Flush every toilet and watch the bowl refill and stop. Run two fixtures at once somewhere to see whether pressure collapses.
Then look for the evidence water leaves. Open the cabinet under every sink you just ran and check for drips at the trap and the supply connections, since a fitting that was disturbed during a move-out can weep quietly for days. Look at the ceiling below any bathroom on an upper floor. Check the floor around the water heater, the base of every toilet, and any visible shutoff valve.
Do not skip the water heater itself. Confirm it is on, that the pilot or ignition is functioning if the property uses gas, and that hot water actually arrives at a distant fixture rather than only at the nearest one. In an empty house that has been closed up, a water heater that has been switched off or turned down is common and is usually a five minute conversation rather than a crisis, but you cannot have that conversation if you never ran the hot tap.
Check 5: The appliances that convey, running a real cycle
Read the contract to see which appliances convey, then test each one on that list. Turn on every burner and the oven, listen for the range hood, start the dishwasher and let it run long enough to fill and pump, run the garbage disposal, start the washer on a short cycle and the dryer on heat, and open the refrigerator to confirm it is cold rather than merely plugged in. Appliances are the single most common source of surprise at this stage because they are portable, valuable, and easy to swap.
Swapping is worth a specific mention. Compare what is in the house against the listing photos and the contract, not just against your memory. If the contract or the photos show a particular appliance and something different is standing in its place, that is a walk-through finding regardless of whether the replacement seems comparable. You agreed to buy what was described.
Sound and time are your instruments here. A dishwasher that fills and drains, a washer that spins, and a dryer that produces warm air on a short setting tell you far more than a machine that merely lights up. Run them early in the visit so they finish before you leave. On the illustrative purchase, every conveying appliance runs, which is the ordinary and expected result, and it takes about fifteen minutes of the hour to establish.
Check 6: Light fixtures, ceiling fans, and anything mounted
Fixtures are where good faith and gray areas meet most often. As a broad principle, items attached to the property tend to be treated as part of it and items that are not attached tend to be treated as the seller’s, but the definitions vary by state and by contract form, and specific fixtures are frequently written into the contract precisely because they are contested. The practical approach is to walk with the listing photos open and compare ceiling by ceiling.
Look up in every room. A missing chandelier over a dining table, a ceiling fan replaced with a bare bulb, or a mounting bracket left with no fixture on it is visible in seconds if you are looking and invisible if you are not. Do the same at the walls: mounted televisions, brackets, mirrors, curtain rods, towel bars, and built-in shelving are all items that get removed on moving day, sometimes without anyone intending to break an agreement.
Then flip every switch. A fixture that is present but does not light is a different finding from a fixture that is gone, and both belong on the list. If something is missing, photograph the spot where it was, find it in the listing photos, and send both to your agent while you are still in the room. That pairing is what turns a disagreement about memory into a documented comparison.
Check 7: Window coverings, shelving, and the gray-area items
The predictable disputes cluster in a narrow band of items: blinds and curtain rods, garage storage systems, workbenches, shed contents, above-ground pool equipment, mounted speakers, water softeners, and anything a seller installed themselves. Reasonable people genuinely disagree about several of these, which is why contracts often list them explicitly and why the answer in your transaction is the answer written in your contract, not the general custom.
Walk this category as a distinct pass rather than folding it into the room-by-room sweep, because the items are easy to overlook when the room is empty and there is nothing to draw the eye to a bare window. Check each window for the covering it had. Check the garage walls for the shelving and hooks. Check the shed and any outbuilding.
Where the contract is silent and something you assumed would stay is gone, you are in the softest part of the whole checklist, and the honest position is that you may or may not have a claim. That is a question for your agent, who will know both the local custom and what the listing side is likely to accept. What you can do reliably is document the difference immediately. Our market note on seller concessions covers the wider mechanics of how the parties trade value when something needs resolving.
Check 8: Outlets, switches, and the garage door
Sample the electrical system rather than trying to test all of it. Work through a handful of outlets in each room with an inexpensive tester, concentrating on the ones near water, in the kitchen, bathrooms, garage, and outdoors, since those are the locations where ground-fault protection matters and where repair addenda most often land. Flip every switch you pass and note anything that operates nothing.
Confirm the panel is where the inspection said it was and that nothing obvious has changed at it. You are not opening anything or diagnosing anything. A door left off, visible scorching, or a new run of amateur wiring since the inspection is what you are looking for, and any of those goes straight to your agent.
Then test the garage door, both from the wall button and from any remote the seller is leaving, and confirm the safety reverse works by interrupting the sensor beam with a foot or an object. Note whether the remotes and any keypad code are being handed over. Garage doors are mechanical, heavily used, and frequently the last thing anyone thinks about, which is exactly why they belong on a list rather than in your intentions.
Check 9: Damage from the move-out
Moving day is the single most destructive event a house experiences between contract and closing, and this check exists because of it. Walk the path a heavy object takes from the farthest bedroom to the front door and look at that path specifically: floors for gouges and scrapes, walls for scuffs and holes, doorframes and corners for crushed trim, stair treads and railings for damage, and thresholds for lifted edges.
Then look at the surfaces that furniture was hiding. Carpet under a bed, hardwood under a rug, and a wall behind a bookcase are all things you have almost certainly never seen, and a stain or a patch appearing there is not necessarily new damage. This is the place to be scrupulously fair with yourself. The standard is the condition you agreed to buy, allowing for ordinary wear, and a home that was lived in has always had a floor under the sofa.
Separate genuine damage from ordinary marks as you go, because the difference decides whether the item is worth raising. Nail holes where pictures hung and light scuffing are usually the wear of a move. A cracked tile, a torn floor plank, a broken banister, or a hole in drywall is damage. Photograph everything in the second group with something in frame for scale, and send it while you are there.
Check 10: Doors, windows, locks, and keys
Open and close every exterior door and a sample of interior ones, and check that each latches and locks. Do the same with windows, particularly on upper floors, since a window that will not close or lock is both a security issue and a heating cost. Look at screens, which are removed and misplaced with impressive regularity during a move.
Keys and access devices deserve their own moment. Establish what you are receiving and when: house keys, mailbox key, any gate or shed key, garage remotes, keypad codes, alarm codes, and any smart lock or thermostat that needs to be transferred out of the seller’s account. Digital access is the newer version of this problem and the one most often forgotten, because a smart device that still answers to a previous owner’s phone is not really yours.
Practical note on the keys themselves: whatever you receive, rekeying or replacing exterior locks after closing is a widely recommended step, since neither you nor the seller can account for every copy made over the years. Treat the handover as a list to confirm rather than an assumption, and ask your agent when and how it will happen, because in some transactions keys are delivered at the closing table and in others they are left in the house.
Check 11: The basement, attic access, and crawlspace
The lower and upper edges of a house are where an empty property tells the truth. In a basement, look for water that was not there before, since the weeks between inspection and closing may have included the first heavy rain in a while. Check the sump pump if there is one, look at the floor around the perimeter, and put your nose to work, because a musty smell in a closed-up basement is information.
At the attic hatch or the crawlspace access, you are doing far less than an inspector did. Open it, look with a flashlight, and confirm two things: that nothing has obviously changed, and that the seller has not used the space as a place to leave belongings they did not want to move. Attics and crawlspaces are where forgotten items live, and they are also where a leak first shows itself.
Both spaces are also where the property’s mechanical equipment often hides. If the furnace, air handler, or water heater lives down there, this is the moment to confirm it is running and that nothing is dripping under it. If access is unsafe or blocked, do not force it. Note that you could not inspect it, tell your agent, and let the professionals decide whether that matters in your transaction.
Check 12: The yard, the exterior, and an empty house
Finish outside and finish with the emptiness question. Walk the perimeter of the property and compare it against your memory and the listing photos: landscaping that was there, a shed or play structure that was supposed to convey, fencing and gates in working order, and no new damage to walkways or driveway from a moving truck. In seasonal climates, look for anything the season has revealed since the inspection.
Then confirm the house is actually empty and clean of debris. Most contracts expect the property to be delivered free of the seller’s personal property and of trash, though the exact wording is contract specific. Open the garage, the shed, the basement, and every closet rather than trusting the eye level view, because leftover paint, chemicals, tires, and old furniture are the classic parting gift and their removal costs money you did not budget.
Finally, stand still for a minute in the middle of the house and simply notice. Smells, sounds, temperature, and anything that feels different from the property you remember are worth following up on even when they are not on any list. The twelve checks catch the predictable problems, and the last thirty seconds of quiet attention occasionally catches the unpredictable one.

The 12 checks on one page
Everything above collapses into a single page you can carry. Work it in the order that suits the property, but do start the heating or cooling and any appliance cycle first, so the slow items are running while you do the fast ones.
| Check | What to check | What it proves |
|---|---|---|
| ☐ 1 | Agreed repairs, line by line against the addendum | The work you negotiated actually happened |
| ☐ 2 | Invoices or permits for work you cannot see | Concealed repairs were done by the right trade |
| ☐ 3 | Heating and cooling, run in both modes if possible | The system still does what it did at inspection |
| ☐ 4 | Every faucet, toilet, drain, and the water heater | No new leaks, and hot water still arrives |
| ☐ 5 | Every conveying appliance, on a real cycle | Nothing failed, and nothing was swapped |
| ☐ 6 | Light fixtures, fans, and mounted items | Nothing left with the moving truck |
| ☐ 7 | Blinds, rods, shelving, and gray-area items | The contested category matches the contract |
| ☐ 8 | Sample of outlets and switches, garage door | Electrical unchanged, safety reverse works |
| ☐ 9 | Floors, walls, doorframes along the move-out path | Damage from the move is identified now |
| ☐ 10 | Doors, windows, locks, keys, codes, remotes | The property is secure and access transfers |
| ☐ 11 | Basement, attic hatch, crawlspace | No new water, and nothing left behind |
| ☐ 12 | Yard, exterior, and an empty, debris-free house | Delivered in the condition the contract requires |
Two habits make the table work. First, tick each line as you finish it rather than at the end, because the checks you skip are always the ones you meant to come back to. Second, next to anything not ticked, write one sentence about what you saw. That sentence is what your agent needs, and it is what your own memory will not supply tomorrow.
Where walk-through problems most often surface
The two charts below hold illustrative shapes rather than measured statistics. Their job is to show how walk-through findings tend to distribute so you know where to spend your hour, not to report a survey. The first answers a question about location: when something is wrong at a walk-through, what is it usually.
Where walk-through problems tend to surface, illustrative
Rough share of walk-through findings by type. Bars are scaled to the largest category. Illustrative only, and your own transaction will differ.
Each bar is scaled to the 26 percent repairs figure, and the shares are illustrative and sum to 100 percent. The shape is the lesson: repairs and conveying items together account for roughly half of what goes wrong, which is why checks 1, 2, 6, and 7 deserve most of your hour.
Read that as a pacing guide. If half of all findings live in the repair addendum and the conveying-items list, then a walk-through that spends forty minutes admiring the natural light and five minutes on the addendum is being run backwards. The lighter bars are not unimportant, and the utilities bar in particular is the one that quietly disables the rest of the list, but they take less of your attention to clear.
How walk-through findings sort by severity
The second chart answers the question that actually decides what you do next. Of the things people find at a walk-through, how many are serious. The honest answer is that most are not, and knowing that in advance keeps a scuffed wall from turning into a crisis at eight in the morning on closing day.
An illustrative walk-through, by severity of finding
Illustrative shares of what a walk-through turns up, summing to 100 percent. Your own visit and contract will differ.
Illustrative shares. The 58 percent cosmetic band is the ordinary wear of a move and rarely worth a phone call. The 32 percent band is where most real walk-through findings live and where a same-day conversation usually resolves them. The 10 percent band is where your contract, your lender, and a professional opinion start to matter.
That distribution is the reason to walk with a list and a level head at the same time. A buyer who treats every mark as a breach spends the last morning of the purchase in an argument over a nail hole and arrives at the signing exhausted and resented. A buyer who treats nothing as a breach signs away the only leverage the transaction ever gave them. The skill is putting each finding in the right band quickly, then spending your energy only on the narrow dark one.
What leverage you actually have at this point
Here is the part of the walk-through that is most often stated too confidently, including by people who should know better. What you can do about a problem you find is determined by your purchase contract, by the standard forms used in your state, by any repair addendum you signed, and in practice by what your lender and settlement agent will agree to. It is not a set of rights that comes with being a buyer.
That means the honest version of this section is a set of questions rather than a set of answers. Does your contract describe the condition in which the property must be delivered, and what does it say happens if that condition is not met. Does it address the walk-through specifically, and if so, what does it permit. Is a repair escrow or holdback something your lender will even allow on your loan, since many will not. Is delaying the closing something your rate lock, your moving schedule, and the seller’s own purchase can absorb. Every one of those is answered by documents and people specific to your deal.
So route it rather than assume it. Your agent is the first call and knows both the contract and the local custom. Where the contract, your state’s practice, or the size of the problem points to one, a real estate attorney is the second. Our market note on escrow explains the account that sits at the center of several of these conversations, and our contingencies read covers the earlier protections that shaped what you have now. Do not take a position on the phone with anyone before you have that advice.
What to do when something is wrong
Do four things, in this order, and do them while you are still in the house. Photograph the problem, with something in frame for scale where scale matters. Write one clear sentence describing what you found and where. Call your agent, and follow the call with the same description in writing so a record exists. Then stop, and do not negotiate with anyone at the property.
That last instruction matters more than it sounds. Walk-through problems get resolved between the parties through their representatives and, where money is involved, through the settlement agent, because anything agreed has to end up reflected in the paperwork that funds and records the sale. A verbal understanding reached in a kitchen with a seller who happens to be there does not bind anything and can complicate what your agent is trying to arrange.
Speed is the other lever you control. A problem raised at nine in the morning has a business day around it: contractors can be called, credits can be discussed, documents can be reissued if the lender requires it. The same problem raised as the pen touches the paper has almost none of that. Our market note on reading a closing disclosure covers the document any late change has to land on, and the companion will size your own open items while you make the call.
The worked example: one walk-through, start to finish
Numbers and decisions cohere when they run through one scenario, so here is the illustrative purchase in full. The price is $400,000, closing is at eleven the next morning, and the walk-through is at four in the afternoon the day before. The repair addendum has four lines. The buyer arrives with the contract, the addendum, the inspection report, and the listing photos on a phone, plus an outlet tester.
The first ten minutes start the slow items: the thermostat calls for heat, the dishwasher starts a cycle, and the hot tap runs at the far bathroom. Then the addendum. Three of the four lines verify: the supply valve is replaced and dry, the panel shows the corrected breaker, and the gutter section is re-secured. The fourth does not, since the hall bathroom outlet reports the same condition the inspector flagged. Separately, the dining room ceiling has a bracket and no fixture, and the listing photos clearly show a fixture there.
So the tally is four repairs promised, three verified, one open, and one conveying item missing. Two findings, both landing in the middle severity band. The buyer photographs both, sends them to the agent at 4:20, and the agent opens the conversation with the listing side the same afternoon. To size the ask, the buyer needs a number for finishing the open work, and the honest way to get one is a real quote rather than a guess. For the arithmetic here, use an illustrative placeholder of $1,800 covering both items, a figure that stands for nothing in particular and that you should replace with an actual estimate.
Against a $400,000 price, $1,800 is 0.45 percent, which is the useful frame: this is a small-money problem with a hard deadline, not a deal-threatening one. What form the resolution takes, a credit at closing, work completed before the appointment, or something else, is a contract and lender question the agent takes forward. The buyer’s job was to find both items, document them, and hand them over with most of a business day still on the clock. Run your own version through the companion.
Common walk-through mistakes
Most walk-through regrets come from the same small set of errors, and naming them is the cheapest way to avoid them.
- Skipping it to protect the schedule. The visit takes under an hour and sits at the last point where a condition problem is still part of a live transaction. There is no scheduling saving that justifies giving that up.
- Walking without paper. Doing the visit from memory turns every comparison into an argument you cannot win. The contract, the addendum, the report, and the listing photos are the whole method.
- Looking instead of testing. A house that looks fine and a house where everything runs are different findings. Turn on the heat, run the appliances, open the taps, and test outlets.
- Treating the walk-through as a second inspection. Reopening the age of the roof at this stage is not a walk-through item, and pursuing it costs you credibility on the items that are.
- Going before the seller has moved out. You cannot see the floors, confirm the house is empty, or catch move-out damage that has not happened yet.
- Negotiating at the property. Anything agreed has to reach the settlement paperwork. Route it through your agent and, where money or contract terms are involved, the professionals who can actually document it.
- Assuming a remedy you do not have. Delay, holdbacks, and refusing to close are contract and lender dependent. Asserting one you do not hold is its own expensive mistake.
The root of all seven is the same: treating an hour that is genuinely consequential as a ceremonial last look at a house you already own. You do not own it yet, which is the entire reason the visit exists.
Special cases worth planning for
Not every purchase produces a simple empty house the afternoon before closing, and the awkward versions are worth thinking about in advance. In new construction, the walk-through often runs alongside a builder orientation and a punch list, which is a different instrument with its own process and its own warranty behind it. Confirm with your agent which document governs which item, because a punch list handled under a builder’s warranty and a contract condition are not the same thing. Our read on new construction versus an existing home covers the wider differences.
A vacant home that has been empty for months poses the opposite problem: there is nothing to move out, but systems have been sitting unused, and utilities may have been off long enough that a full test takes more time than you planned. Arrange the utilities question early. A tenant-occupied property is harder still, since access depends on the tenant’s rights and the tenant may still be in place at closing. That is a situation to work through with your agent well before the last week.
Then there is post-closing possession, where the seller stays in the home for a period after the sale under a separate written agreement. The walk-through in that arrangement confirms condition at the time of closing, but you are also taking on the condition question again at the end of the occupancy period, which is exactly why those agreements are written documents with their own terms. All three cases share a lesson: the standard checklist still applies, and the process around it needs arranging in advance rather than improvised on the day.

What the walk-through does not cover
Being clear about the boundaries protects you from expecting the wrong thing. The walk-through does not evaluate the structure, the roof, the remaining life of any system, or anything concealed. It does not replace an inspection, and the person doing it, you, is not performing a professional examination. Our market note on how to get a home inspection covers the process that does that job while your contingencies are still alive.
It does not resolve title, liens, survey questions, or anything about ownership rather than condition. Those live with the settlement agent and the title work. It does not confirm your loan, your figures, or your cash to close, all of which belong to the closing disclosure and the lender. And it does not, on its own, create any remedy, which is the point the section on leverage above makes at length.
What it does is narrow and valuable: it establishes the property’s condition at the last moment before the money moves, with a documented record you created. That record is useful even in the ordinary case where everything is fine, because a set of dated photographs of an empty house is a genuinely helpful thing to own on the day something turns up a month later. Treat the walk-through as evidence-gathering that usually produces good news rather than as a hunt for problems.
The bottom line
The final walk-through is one hour, it happens once, and it cannot be repeated after you sign. Work it as twelve concrete checks rather than as a last look: the agreed repairs against the addendum, documentation for anything you cannot see, heating and cooling running, water at every fixture, every conveying appliance on a real cycle, fixtures and mounted items still in place, the gray-area items against the contract, outlets and the garage door, damage along the move-out path, doors and windows and the key handover, the basement and attic and crawlspace, and finally the yard and an empty, debris-free house.
Bring paper, turn everything on, and photograph anything that has changed. Then sort what you find honestly, because most walk-through findings are cosmetic and a few are real, and spending your last morning on a nail hole is how buyers lose the standing to raise the thing that matters. When something genuinely is wrong, document it, call your agent immediately, put it in writing, and let the people who know your contract tell you which options exist, rather than assuming a delay, a holdback, or a refusal to close is yours for the taking.
Do that, and the walk-through stops being the nervous formality between the loan approval and the keys. It becomes what it was designed to be: the moment you confirm that the house you are about to pay for is the house you agreed to buy, on a record you made yourself, while there is still time and still a transaction to work with.
Treat this market note as educational planning material about a step in a residential purchase, not as legal, financial, lending, or professional inspection advice, and not as a substitute for a licensed home inspector’s examination. The dollar figures, percentages, counts, and chart shares above are illustrative and rounded to show a method, and your own property, contract, findings, and costs will differ. What a buyer may do about a condition problem discovered before closing depends entirely on the purchase contract, the forms and law of your state, any repair addendum, and what your lender and settlement agent will permit, and none of it should be assumed from a checklist. Confirm your own position with your real estate agent and, where the situation or your contract calls for one, a licensed real estate attorney in your state before you sign, delay, or decline to close.
Frequently asked questions
What is a final walk-through checklist and what does it cover?
A final walk-through checklist is the short list you work through on the last visit to the property before closing, usually within a day of the appointment. It is a condition check rather than an inspection. The list confirms that the repairs the seller agreed to make were actually made, that the heating, cooling, plumbing, and electrical systems still run the way they ran earlier, that the appliances and fixtures the contract said would convey are still in place and working, that the move-out did not damage floors, walls, or doorframes, and that the property is empty of the seller's belongings and debris. It is deliberately narrow. You are not re-opening the condition of the home, you are confirming that nothing changed between the day you agreed to buy it and the day you pay for it.
How long before closing does the final walk-through happen?
Most purchase contracts give the buyer the right to a walk-through shortly before the closing appointment, and in practice it is commonly scheduled the day before or the morning of closing. The timing is a trade-off. Going too early means the seller may still be moving out, so you cannot see the empty house or the damage a moving truck might cause on its way out the door. Going too late leaves no working hours to resolve anything you find. Many buyers and agents aim for the last afternoon or the morning of, close enough that the house is genuinely empty but with enough of a business day left that a phone call can still reach a settlement agent or a lender. The exact window your contract grants you is worth reading rather than assuming, because the forms differ.
What happens if the seller did not complete the agreed repairs?
Raise it immediately, in writing, through your agent, and do not sign anything before you understand your options. What happens next is not a fixed rule, it depends on your purchase contract, the addendum that set out the repairs, your state's standard forms, and what the lender and the settlement agent will agree to. In some transactions the parties negotiate a credit, in some the closing is rescheduled, and in some a repair escrow or holdback is arranged, but none of those is automatically available to you and some require lender approval. Your agent, and where the contract or your state's practice points to one, a real estate attorney, are the people who can tell you which of those doors is actually open in your deal. The one thing that is broadly true is that raising a problem before the signing is far easier than raising it after.
Can a buyer refuse to close because of a walk-through problem?
That is a contract question, not a general right, and it is one to put to your agent or attorney rather than to assume in either direction. Purchase contracts vary by state and by form in how they define the condition the property must be in at delivery, what counts as a breach, and what a buyer may do about it. Refusing to close when your contract does not support that position can put your earnest money and your position at risk, and closing anyway when a real problem exists can leave you with a claim you have to pursue afterward against a seller who no longer has any reason to cooperate. Because both errors are expensive, this is the moment in the transaction where a professional opinion on your specific contract is worth more than any checklist, including this one.
Is the final walk-through the same as a home inspection?
No, and confusing the two causes most of the disappointment buyers feel at this stage. A home inspection happens early in the contract period, is performed by a licensed inspector, takes hours, examines the systems and structure of the home, and produces a written report you can negotiate from while your contingencies are alive. The walk-through happens at the very end, is performed by you, takes well under an hour, and asks only whether the property is in the condition you agreed to buy. Discovering at the walk-through that you dislike the age of the furnace is not a walk-through finding, it is an inspection you did not order or a report you did not read. Our market notes on the inspection checklist and on how to get a home inspection cover that earlier, larger job.
Should the seller's belongings and trash be gone at the walk-through?
In most residential transactions the seller is expected to deliver the property empty of their personal property and free of debris, but the precise wording lives in your contract and sometimes in a separate possession agreement, so read it rather than assuming a standard. A garage of leftover paint cans, a shed nobody emptied, or a basement of furniture is a legitimate walk-through item because removal and disposal cost real money and real time you did not price into the purchase. Photograph what is there, note it on your list, and send it to your agent while you are still standing in the house. Some sellers genuinely intend to return for a final load, which is exactly the conversation to have before the signing rather than after.
What should I bring to the final walk-through?
Bring the purchase contract and any repair addendum, the inspection report, the seller's disclosure, the listing photos, a phone with a charged battery, and something to write on. Every one of those is a reference document, because the walk-through is a comparison exercise and human memory is a poor record of what a dining room looked like six weeks earlier. Listing photos are the underrated item on that list, since they are the easiest way to establish that a light fixture, a set of shelves, or a window treatment was present when you agreed to buy. A phone charger or a small charger block is worth carrying too, because photographs and a phone call to your agent are the two things you will actually need if something is wrong.
What if I cannot attend the final walk-through in person?
Tell your agent as early as you can, because there are workable substitutes and they all take arranging. Many buyers who are out of state or otherwise unable to attend have their agent walk the property on a video call, which lets you direct the camera to the specific repairs, appliances, and rooms on your list in real time. Some appoint a trusted local person to attend, and some combine a video walk with a detailed photo set. What you should not do is silently skip the visit to keep the schedule intact, because the walk-through is the last point at which a condition problem is a live transaction issue rather than a dispute between two strangers. Our market note on buying a house out of state covers the wider version of this problem.

Hamza Hai is the editor of AbodeWave. She holds an MBA and reviews the site's articles against our editorial standards, checking that every figure is labelled for what it is, that nothing is presented as verified fact without a source the reader can check, and that the writing stays useful to a non-specialist.