
What's in this market read
- What a home inspection actually covers
- The exterior and roof checklist
- The structure, foundation, and attic checklist
- The plumbing checklist
- The electrical checklist
- The heating and cooling checklist
- Your room-by-room master checklist
- Your system-by-system checklist
- Red flags and deal-breakers versus minor issues
- What a standard inspection does not check
- How to use the results to negotiate
- The buyer’s final walkthrough checklist
- How to prepare for inspection day
- Where inspection findings commonly surface
- An inspection checklist by severity
- The worked example: a checklist in action
- Common checklist mistakes buyers make
- The bottom line
Short answer: A home inspection checklist for buyers walks the home two ways: by system (roof, foundation, plumbing, electrical, heating and cooling, structure, exterior, attic, appliances) and by room (kitchen, baths, living areas, basement or crawlspace). Sort every finding onto one of three shelves: cosmetic to monitor, moderate to negotiate, and major or safety to act on. A standard inspection is visual and non-invasive, so flag sewer, radon, mold, and pest follow-ups separately.
A check-off list for a home inspection turns a nerve-racking walkthrough of a six-figure asset into an orderly, room-by-room and system-by-system sweep where nothing important slips past you. The difference between buyers who close with confidence and buyers who inherit an expensive surprise is rarely the house. It is whether they walked in with a list, knew what each item meant, and sorted the findings into what they could ignore, what they could negotiate, and what should stop the deal.
This market note is that list. It lays out what a standard inspection covers across the roof, foundation, plumbing, electrical, heating and cooling, structure, exterior, attic, and appliances, then walks the home room by room and system by system so you know exactly what to check off. It separates real red flags and deal-breakers from the ordinary wear every used home carries, names what inspectors do not check, shows how to turn the results into a negotiation, and closes with a buyer’s final walkthrough checklist for the day before closing. It sits alongside our step-by-step market note on how to get a home inspection, which covers the process this checklist is used inside, our full home buying checklist, which places the inspection inside the whole purchase sequence, our offer market read, and our closing-cost market read. The companion beside this note reads your own findings into an illustrative negotiation ask as you go.
Key takeaways
- A good check-off list for a home inspection walks the home two ways: by system (roof, foundation, plumbing, electrical, heating and cooling, attic) and by room (kitchen, baths, living areas, basement or crawlspace), so nothing accessible is missed.
- Every finding sorts onto one of three shelves: cosmetic or minor to monitor, moderate to negotiate, and major or safety to act on. The count of items matters far less than which shelf they land on.
- Red flags worth a specialist include foundation movement, a roof at end of life, active water intrusion, unsafe wiring, and a failing furnace. None is automatically fatal, but each should be scoped and priced before you commit.
- A standard inspection is visual and non-invasive, so it does not check the sewer line, radon, hidden mold, pests inside structures, or detailed structural analysis. Your list should flag when to order those follow-ups.
- Use the sorted list to negotiate repairs, a credit, or a price cut, or to walk away, and always hire a licensed inspector rather than relying on your own walkthrough alone.
What a home inspection actually covers
A standard home inspection is a visual, non-invasive examination of the home’s readily accessible systems and components on the day of the visit, and knowing its full scope is what lets you build a check-off list that mirrors it. The inspector looks at the roof and exterior, the structure and foundation as far as they are visible, the electrical system, the plumbing, the heating and cooling equipment, the interior including walls, floors, windows, and doors, the built-in appliances, and the attic, insulation, and ventilation. Each of those becomes a section of your list.
The value of understanding the scope up front is that it tells you two things at once: what the inspector will examine, and, just as important, where the standard visit stops. Because the examination is visual and non-invasive, the inspector will not open walls, dig up buried lines, or run anything that could damage the home, so concealed defects can be missed. That boundary is not a flaw in the inspection; it is the reason your list should also carry a column for specialist follow-ups, which the section on what a standard inspection does not check covers in full.
Think of the coverage as broad and shallow by design. A generalist inspection spreads its attention efficiently across many systems to catch the ordinary problems of a used home, and it is worth its illustrative fee precisely because of that breadth. The room-by-room and system-by-system checklists below take that broad scope and turn it into concrete items you can tick off as you walk the home, so the abstract idea of coverage becomes a page you can actually work from. Keep the companion open as you read, and it will translate the findings you log into an illustrative negotiation ask.

The exterior and roof checklist
Start outside, because the exterior and roof are where the most expensive findings tend to surface and where a careful walk of the perimeter tells you a great deal before you ever step inside. Walk the full outside of the home and look up as much as down. On the roof, note the material and its apparent age, missing, curling, or patched shingles, the condition of flashing around chimneys and vents, and any sag in the roofline, which can hint at a structural issue beneath. On the exterior walls, look at the siding or brick for cracks, rot, or gaps, and check that caulking and seals around penetrations are intact.
Bring your eye down to the ground next. Gutters and downspouts should be secure and should carry water away from the foundation, not dump it against the house, since poor drainage is a quiet cause of many basement and foundation problems. Look at the grading: the soil should slope away from the home. Check the driveway and walkways for heaving or large cracks, decks and porches for solid rails and footings, and any retaining walls for lean or bulge.
On the illustrative home that runs through this note, suppose the roof shows shingles the inspector estimates are near the end of their service life and a downspout that empties right at the foundation corner. Neither is a crisis on its own, but both go on the list as items to price and, in the roof’s case, to have a roofing specialist scope for remaining life and replacement cost. The exterior is also where curb condition and real condition can diverge, so a fresh coat of paint over a soft, rotted board is exactly the kind of thing a slow, deliberate perimeter walk is meant to catch.

The structure, foundation, and attic checklist
The structure is the part of the home you least want a surprise in, so this section of the list deserves patience even though much of the structure is hidden. In the basement or at the foundation walls, look for cracks and note their pattern: fine vertical hairlines are common and often benign, while horizontal cracks, stair-step cracks in block or brick, or cracks wide enough to slip a coin into are the ones that call for a structural opinion. Check whether floors feel level, whether doors and windows close squarely, and whether there are props, shims, or fresh patches that might be masking movement.
Water and structure are linked, so look for the evidence water leaves: efflorescence (a white mineral residue) on foundation walls, staining, a musty smell, or a visible sump pump and whether it looks active. In the attic, which the inspector reaches where it is accessible, the checklist covers the underside of the roof deck for stains or daylight, the framing for cracks or past repairs, the insulation depth and coverage, and the ventilation that keeps moisture from building up. A poorly ventilated attic shows itself in matted insulation, mold-like staining on the sheathing, or rusted nail tips.
On the illustrative home, the inspector notes a single stair-step crack in the basement block and a door upstairs that sticks. That combination is the classic cue to spend on a structural evaluation before the contingency deadline, because the gap between minor settling and a genuine structural problem is the gap between a small repair and a five-figure one, and you want that answer before you commit. Log the finding, flag it for a specialist, and let the companion hold it in view as you weigh the negotiation.
The plumbing checklist
Plumbing is a system where small visible clues point to larger hidden conditions, so work it methodically. Identify the main water shutoff and the water heater, and note the heater’s apparent age, its capacity, any corrosion or rust at the base, and whether it has a working temperature-and-pressure relief valve and proper venting. Run water at fixtures to check flow and, roughly, drainage speed, and look under sinks for active drips, water stains, or the telltale bucket that suggests a recurring leak. Flush toilets to confirm they fill and clear, and check around their bases for rock or moisture.
Trace what you can of the supply and drain pipes and note the materials, since some older materials are worth flagging for a closer look. Look for signs of past or present leaks at joints, water heaters, and where pipes pass through walls or floors: stains, mineral crust, or fresh repairs. Test water pressure informally by running two fixtures at once, and note any dramatic drop. Do not forget the exterior hose bibs and, where present, any well or septic components, which often fall to specialists.
The plumbing checklist is also where the sewer line earns its own note. A standard inspection does not run a camera down the sewer, so if the home is older or has mature trees near the line, write “order sewer scope” on your list rather than assuming the drains are sound because they cleared at the sink. On the illustrative home, the inspector flags an aging water heater near the end of its typical service life and some dated supply lines. Both go on the list: the heater as a near-term replacement to budget for, the lines as an item to watch and, if the home’s age warrants, to have looked at more closely.
The electrical checklist
Electrical findings skew toward the safety end of the spectrum, so this section of the list is one where “minor” and “urgent” can sit side by side and you cannot judge by cost alone. At the panel, note the apparent capacity, whether the panel brand is one commonly flagged as problematic, and obvious hazards a qualified inspector will call out, such as double-tapped breakers, scorching, corrosion, or a rat’s nest of amateur wiring. You are not diagnosing the panel yourself; you are logging what the inspector points to so you understand which findings are safety items.
Move through the living space and test a sample of outlets and switches. The checklist here covers whether outlets are grounded, whether ground-fault protection is present where it should be, near sinks, in bathrooms, kitchens, garages, and outdoors, and whether switches operate the fixtures they should. Look for cover plates that are missing, outlets that are loose or warm, and extension cords used as permanent wiring, which is a sign of too few circuits. Check that smoke and carbon-monoxide detectors are present and, ideally, functional.
On the illustrative home, the inspector finds a double-tapped breaker in the panel and a bathroom outlet without ground-fault protection. Both are inexpensive to correct but both are genuine safety items, which is exactly why the severity of a finding, not its price, decides where it lands on your list. Safety findings tend to rise to the top of any repair conversation regardless of how little they cost to fix, so mark them clearly. Cheap does not mean ignorable when the issue is electrical.
The heating and cooling checklist
Heating and cooling equipment is expensive to replace, so its condition and age carry real weight on the list even when the system runs on the day of the inspection. Identify the furnace or heat pump and the air conditioning, note the apparent age from the label or serial, and log any signs of neglect: heavy rust, a cracked or dirty filter left in for months, disconnected ducts, or scorching. Ask the inspector to run the heat and, weather permitting, the cooling, and note whether each cycles on, produces conditioned air, and shuts off normally.
The checklist here is as much about remaining life as about function. A furnace that works but is well beyond its typical service window is not a defect exactly, but it is a large, foreseeable cost you want priced into the decision, the same way an aging roof or water heater is. Note the condition of the ductwork where it is visible, whether registers deliver air in the rooms you test, and whether the system’s capacity seems matched to the home. For fuel-burning equipment, the inspector will look for proper venting and combustion safety, which are safety items, not comfort ones.
On the illustrative home, the air conditioning runs but the furnace is old enough that the inspector notes it as near the end of its service life and recommends a closer look by an HVAC technician. That goes on the list twice: once as a system that currently works, and once as a foreseeable replacement to budget and, potentially, to negotiate. A working-but-old system is a classic case where the honest read is “functional today, plan for tomorrow,” and where a technician’s scoped estimate turns a vague worry into a number you can use.
Your room-by-room master checklist
With the systems understood, it helps to walk the home the way you will actually move through it, room by room, so nothing is skipped because it did not fit neatly under a system heading. The table below is a compact master list you can check off as you go. It is a companion to the inspector’s formal report, not a replacement for it, and the “why” column is there so a finding is never just a box but a reason.
| Check | Area | What to check off | Why it matters |
|---|---|---|---|
| ☐ | Roof and exterior | Shingle condition, flashing, gutters, grading, siding, decks | Costliest findings surface here; drainage protects the foundation |
| ☐ | Foundation and basement | Crack pattern, level floors, water staining, sump pump | Structural findings are the hardest to price and the most consequential |
| ☐ | Attic | Roof-deck stains, framing, insulation depth, ventilation | Hidden leaks and poor venting show up here first |
| ☐ | Kitchen | Appliances operate, outlets grounded, cabinets, leaks under sink | Built-ins and hidden leaks are easy to miss without testing |
| ☐ | Bathrooms | Water pressure, drainage, toilet base, ventilation, ground-fault outlets | Water damage and mold often start in baths |
| ☐ | Bedrooms and living areas | Windows open and lock, floors level, walls, outlets, detectors | Sticking windows and sloping floors can hint at bigger issues |
| ☐ | Basement, garage, crawlspace | Moisture, structure, panel, water heater, auto door safety | Systems concentrate here, out of everyday sight |
Work the table in the order you tour, and against each row note not just the condition but the two flags that decide everything later: is it a safety concern, and does it look major or minor. On the illustrative home, most rows come back clean or cosmetic, a handful come back moderate, and one, the foundation row, comes back flagged for a specialist. That distribution, not the number of ticks, is what you carry into the negotiation, and it is exactly the split the severity chart later in this note makes visible.
Your system-by-system checklist
The second way to walk the home is by system, which catches anything that spans rooms, such as the plumbing or the electrical, and gives you a clean summary to hand to your agent. The table below mirrors the scope of a standard inspection so your list and the report line up item for item.
| Check | System | Key items | Specialist cue |
|---|---|---|---|
| ☐ | Roofing | Age, shingles, flashing, penetrations, roofline sag | Roofing specialist if near end of life |
| ☐ | Structure and foundation | Crack pattern, movement, level, water intrusion | Structural engineer for horizontal or stair-step cracks |
| ☐ | Plumbing | Supply and drain condition, water heater, leaks, pressure | Sewer scope on older homes or near mature trees |
| ☐ | Electrical | Panel, grounding, ground-fault protection, hazards, detectors | Licensed electrician for panel or wiring concerns |
| ☐ | Heating and cooling | Function, age, venting, ductwork, remaining life | HVAC technician for aging or fuel-burning equipment |
| ☐ | Attic and ventilation | Insulation, venting, roof-deck condition, moisture | Roofer or remediation pro if staining is found |
| ☐ | Appliances | Built-ins operate, no leaks, safe connections | Note age and condition; usually no specialist needed |
The specialist column is the part buyers most often leave blank and most often regret, because it is where a vague worry becomes a scoped, negotiable number. A standard inspection tells you that something may be wrong; the specialist tells you how wrong and what it will cost to fix. On the illustrative home, the plumbing row triggers a sewer scope given the home’s age, and the structure row triggers a structural evaluation. Both come back with real numbers, and those numbers, not the raw list of findings, are what the negotiation runs on. Feed them into the companion and it will size an illustrative credit to request.
Red flags and deal-breakers versus minor issues
Every finding on your list belongs to one of three shelves, and learning to place them quickly is the whole skill of reading an inspection. The first shelf is cosmetic or minor: a scuffed wall, a dated fixture, a dripping faucet, a loose railing. These are the normal wear of a used home, they belong on your future maintenance list, and reacting to them as if they were defects is how buyers over-negotiate and lose homes they could comfortably keep. The length of this shelf is not a measure of how bad the home is.
The second shelf is moderate: items with a real but bounded cost, such as an aging water heater, some dated plumbing, or a section of worn roofing. These are the everyday material of a negotiation, usually resolved with a repair request or a credit. The third shelf is major or safety: foundation movement, a roof at end of life, active or extensive water intrusion, unsafe wiring, a failing furnace, or a combustion-safety concern. A red flag is any finding that points to this shelf, and the honest posture toward one is not panic but precision: get it scoped by a specialist so a worry becomes a number.
A deal-breaker, then, is rarely a single dramatic finding. It is a major finding whose scoped repair cost, once you actually have the number, no longer fits your budget or your tolerance for risk. That is why the same crack can be a manageable repair for one buyer and a walk-away for another. Sort ruthlessly, spend your negotiating capital only on the moderate and major shelves, and let the cosmetic shelf go. The section on how to use the results turns this sorting into action.
What a standard inspection does not check
A check-off list is only trustworthy if it is honest about its own gaps, and a standard inspection has real ones by design. Because the examination is visual and non-invasive, the inspector will not open walls, move heavy furniture, dig up buried lines, or run any test that could damage the home. That means concealed defects can be missed, and several specific items commonly fall outside the standard scope entirely. The sewer line is the classic example: nothing in a visual inspection sees a root intrusion or a collapsed section underground, which is why a sewer scope is a separate order.
Other common exclusions include radon, a gas that no visual pass can detect and that needs a dedicated test; mold behind surfaces, which usually requires sampling; pests and wood-destroying organisms inside structures, which is a specialist pest inspection; and detailed structural or specialty-system analysis, which is an engineer’s work rather than a generalist’s. Depending on the contract, swimming pools, spas, detached outbuildings, wells, and septic systems may also be excluded or limited. The report’s scope-and-exclusions section is the definitive record of what was and was not examined, and reading it is not optional.
The practical move is to carry a “not checked” column on your list and to fill it deliberately based on the home’s age and setting. An older home, a lot with mature trees near the sewer line, a region where radon is common, or any structural note from the generalist are all cues to order the matching follow-up before your contingency deadline. Skipping a warranted specialist to save a few hundred dollars leaves the biggest risks unmeasured, which is the opposite of what a checklist is for. Knowing the gaps is what turns a clean generalist report from false reassurance into an accurate, bounded picture.
How to use the results to negotiate
The list earns its keep here, because a sorted set of findings is a negotiation and an unsorted pile is just anxiety. Start by separating the three shelves, then get a real repair number on each major and safety item, ordering a specialist wherever the generalist only flagged a concern. With those numbers in hand you have four broad paths, and the right one depends on the severity of the findings, the market, and how the arithmetic lands. As our offer market read frames it, this is a negotiation, so lean on your agent to read what the seller is likely to accept.
The first path is a repair request: ask the seller to fix specific items, usually the safety and major ones, before closing. The second is a credit or price reduction: rather than have the seller manage the work, you ask for a closing credit or a lower price and handle it yourself, which many buyers prefer because they control the quality. The third is a specialist-scoped negotiation, where a follow-up put a firm number on a major item and you negotiate against that figure. The fourth, reserved for serious defects, is to walk away using your inspection contingency and recover your earnest money.
On the illustrative home, the structural evaluation confirms a real but repairable foundation issue with a meaningful cost, and the sewer scope comes back clear. You ask for a credit to cover the foundation repair and the safety wiring item, and you let the long cosmetic list go. The seller counters with a partial credit, and because the adjusted numbers still fit the budget your affordability read set, you accept. Run your own home price, major-repair estimate, and finding counts through the companion and it will size an illustrative credit to request as a share of the price.
The buyer’s final walkthrough checklist
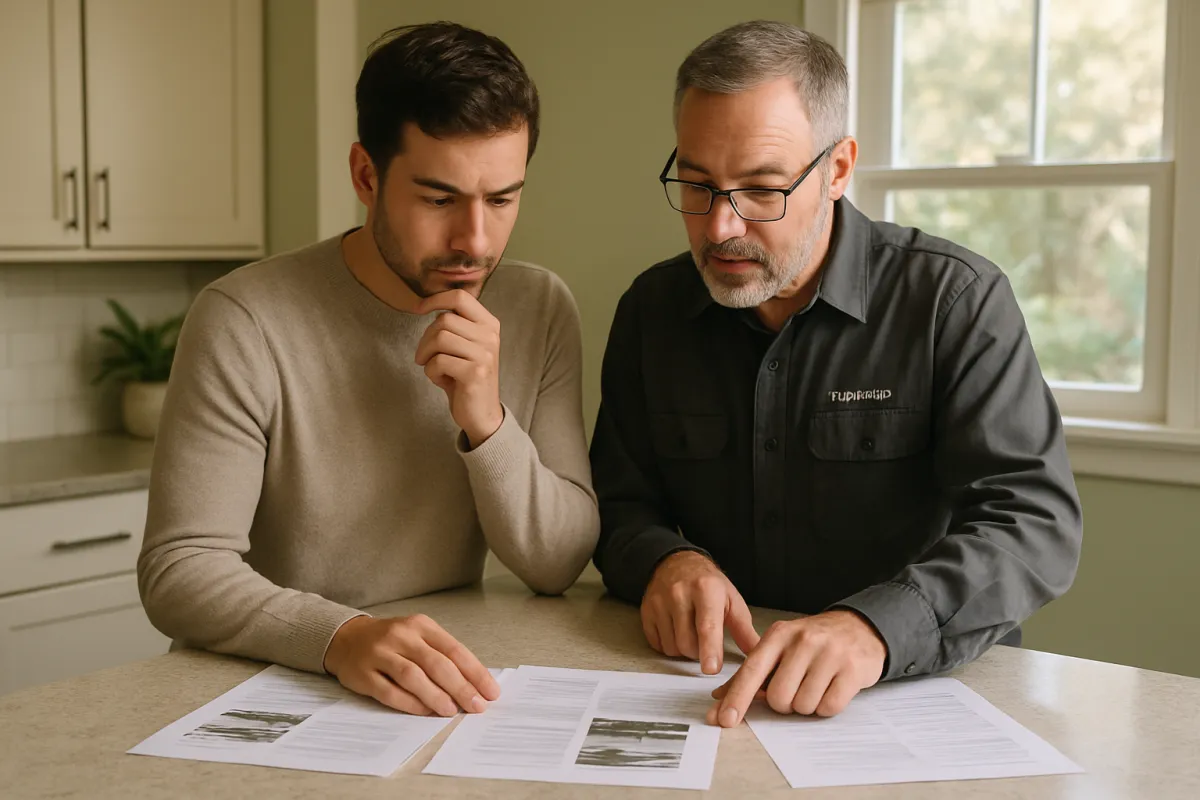
The final walkthrough is a separate, later checklist from the inspection, and confusing the two costs buyers real protection. It happens shortly before closing, and its job is narrow: confirm the home is in the condition you agreed to buy, not to reopen the whole inspection. Walk the home with this short list and you catch the problems that are far easier to resolve before closing than after.
- Confirm that any repairs the seller agreed to make were actually completed, and ask for receipts or documentation where the repair was significant.
- Run water at sinks, tubs, and showers, flush every toilet, and check under sinks for new leaks that were not there at inspection.
- Test a sample of outlets and light switches, and run the heating or cooling to confirm the systems that worked before still work.
- Open and close major windows and exterior doors, and confirm the garage door and its safety reverse operate.
- Verify that fixtures, appliances, and anything else the contract said would stay are still present and undamaged.
- Confirm the home is empty of the seller’s belongings and debris, and that no damage occurred during the move-out.
If something is wrong, raise it with your agent immediately rather than signing and hoping to sort it out later, because your leverage is highest before the money changes hands. The walkthrough is not a formality; it is the last checkpoint where a problem is still the seller’s to fix. Keep this list short and focused, because its power is in being run at the right moment, not in being exhaustive.
How to prepare for inspection day
A little preparation turns inspection day from a passive wait into the most useful hours of your purchase. Before the visit, confirm the appointment through your agent, since the home is still the seller’s until closing, and ask how long the inspection is expected to take so you can plan to be there. Attending in person is one of the highest-value things a buyer can do: a written report describes a problem, but standing next to the inspector lets you see it in context, ask whether it is urgent or cosmetic, and learn where the water shutoff, the electrical panel, and the major systems are.
Bring your own check-off list, a phone for photos and notes, and a willingness to ask plain questions. Many buyers arrive for the last portion of the inspection, letting the inspector work through the home uninterrupted first, then walk the significant findings together at the end. As you walk, use your list to make sure the conversation touches every system and room, and note which findings the inspector calls safety items, which are near end of life, and which are simply the normal wear of a used home.
Do not treat the walkthrough as your only record. Still read the full written report closely when it arrives, usually within a day or two, since it captures detail the conversation skips and includes the scope-and-exclusions section you need. If you genuinely cannot attend, ask for a phone or video walkthrough and go through the report line by line with your agent rather than skimming the summary. Preparation is also budgetary: set aside the inspection fee and room for any specialist follow-ups your list flags, as part of the cash-to-close planning our closing-cost market read lays out.
Where inspection findings commonly surface
Before the two charts, a word on what they are and are not. They hold illustrative shapes, not measured statistics, and their job is to make the checklist’s logic visible rather than to report a survey. The first chart answers a simple question: across a typical inspection, where do the findings tend to cluster? Knowing that helps you slow down in the areas that most often carry cost, and it explains why the exterior and plumbing sections of your list deserve the most patience.
Where inspection findings commonly surface, by area, illustrative
Rough share of a typical report's findings by area. Bars are scaled to the largest area. Illustrative only, confirm with your own inspection.
Each bar is scaled to the roof-and-exterior figure of 24 percent, and the shares are illustrative and sum to about 100 percent. The lesson is not the exact numbers but the shape: the exterior, plumbing, and electrical areas tend to generate the most items, which is why those sections of your check-off list reward the most patience.
The shape is a reminder that findings are not spread evenly, so your attention should not be either. The roof and exterior lead because they are exposed to weather and easy to neglect, plumbing follows because water finds every weakness, and electrical earns its place because small hazards are common and matter out of proportion to their cost. The lighter bars are not unimportant, but they are where a quick, careful check usually suffices. Read the chart as a pacing guide for your walkthrough, not as a reason to skip anything.
An inspection checklist by severity
The second chart answers the question that actually decides your negotiation: of everything the checklist turns up, how much warrants action? The stackbar breaks an illustrative report into three severity bands, so the long, sometimes alarming list resolves into the small share of items that genuinely move a decision. The exact split varies by home and inspector, but the shape holds across most used homes.
An illustrative checklist, by severity of finding
Illustrative shares of the items on a typical checklist, summing to 100 percent. Confirm your own report's specifics with your inspector.
Illustrative shares of a checklist's items. The 55 percent cosmetic-or-minor band is the normal wear of a used home and rarely worth risking a deal over. The 33 percent moderate band is where a credit or repair request usually lands, and the 12 percent major-or-safety band is what drives the decision to negotiate hard or, rarely, to walk away.
This split is the single most important idea in the whole note, because it reframes what a long list means. A checklist with twenty ticks can look daunting until you see that most of them sit in the wide cosmetic band, the ordinary maintenance any home carries, and only a small share belong to the moderate and major bands that justify a renegotiation. A buyer who reacts to the length of the list over-negotiates and risks the deal; a buyer who reads only the summary and misses a major item under-negotiates and inherits the cost. The skill is spending your leverage on the narrow dark bands and letting the wide light one go.
The worked example: a checklist in action
Numbers and decisions cohere when they run through one scenario, so walk the illustrative home from the first tick to a resolved negotiation. On an illustrative $400,000 home with a ten-day inspection window, you attend the final hour and work your check-off list alongside the inspector. The exterior row logs shingles near end of life and a downspout draining at the foundation. The structure row logs a stair-step crack in the basement block and a sticking upstairs door. The plumbing row logs an aging water heater and dated supply lines, and the electrical row logs a double-tapped breaker and a bathroom outlet without ground-fault protection.
Sorting the roughly twenty items by severity, most land on the cosmetic shelf and go straight to your future maintenance list. A handful, the water heater and the worn roofing, are moderate. Two findings, the possible foundation movement and the safety wiring, are the ones that matter, so you order a structural evaluation and, given the home’s age, a sewer scope before the deadline. The structural opinion confirms a real but repairable issue with a meaningful, illustrative cost, and the sewer scope comes back clear, which is exactly the kind of scoped answer the checklist’s specialist column exists to produce.
With numbers in hand, you ask the seller for a credit to cover the foundation repair and to correct the safety wiring, and you let the cosmetic list go. The seller counters with a partial credit, and because the adjusted figures still fit the budget your affordability read set, you accept. You bought with your eyes open, priced the real condition into the deal, and kept your contingency as the exit you never had to use. Drop your own price, major-repair estimate, and finding counts into the companion for your version of this outcome.
Common checklist mistakes buyers make
Most inspection regrets trace back to the same handful of errors, and naming them is the cheapest way to avoid them.
- Counting findings instead of sorting them. A long list is not a bad home. Judge the home by which severity shelf the findings land on, not by how many boxes you ticked, or you will over-react to ordinary wear.
- Treating your list as a substitute for the inspector. Your check-off list makes you a better participant, but the licensed inspector performs the formal examination and writes the report you negotiate from. Use your list to engage with the professional’s work, never to replace it.
- Skipping warranted specialists. Declining a sewer scope, radon test, pest inspection, or structural evaluation when the home’s age or the generalist’s notes call for one leaves the biggest risks unmeasured, which is the one thing a checklist is meant to prevent.
- Ignoring cheap safety items. Severity is not cost. An ungrounded outlet or a double-tapped breaker is inexpensive to fix but is a genuine safety finding that belongs near the top of the list, not buried with the cosmetic items.
- Confusing the inspection with the final walkthrough. They are two different checklists at two different moments. The inspection assesses condition early; the walkthrough confirms nothing changed just before closing.
- Over-negotiating the cosmetic shelf. Demanding the seller fix every minor item can sink a deal on a home you could comfortably keep. Spend your leverage on the moderate and major shelves and let the rest go.
Each mistake shares a root: treating the checklist as a scorecard to tally rather than a sorting tool that turns a home’s real condition into a small number of decisions.
The bottom line
A check-off list for a home inspection is not busywork on the way to closing; it is the instrument that turns a six-figure decision from a hopeful guess into an informed one. Walk the home two ways, by system and by room, so nothing accessible is missed, then sort every finding onto one of three shelves: cosmetic to monitor, moderate to negotiate, and major or safety to act on. The count of items never mattered; the shelf each one lands on is the whole game.
Whatever the home and the market, the discipline is the same. Know the full scope of a standard inspection and, just as clearly, its gaps, so you order the sewer scope, radon test, or structural opinion your list flags before the deadline. Attend the inspection with your own list in hand, let the inspector’s report and your notes map onto each other, and spend your negotiating capital on the findings that actually carry cost or risk. Then run the short, separate final walkthrough before closing to confirm nothing changed. Do that, and the inspection that feels like a hurdle becomes what it always was: the one chance to see a home’s real condition and price it honestly into the deal, on terms you chose rather than a surprise you inherited.
Read this market note as an educational checklist and planning aid, not as financial, lending, legal, or professional inspection advice, and not as a substitute for a licensed home inspector’s examination and report. Every price, percentage, and dollar figure above is illustrative and rounded to show the method, and your own home, findings, specialist costs, and negotiation will differ by location, property, inspector, and market. The scope of a standard inspection, specialist requirements, disclosure customs, and contingency rules vary by market and change over time, so hire a licensed, insured home inspector, order the specialist follow-ups your findings warrant, and confirm the current local requirements with a qualified real estate agent and, where appropriate, an attorney before you waive a contingency or act on any report.
Frequently asked questions
What should be on a check-off list for a home inspection?
A complete check-off list for a home inspection walks the home by system and by room so nothing important is missed. By system it covers the roof and exterior, the structure and foundation, the plumbing, the electrical, the heating and cooling, and the attic, insulation, and ventilation. By room it covers the kitchen and appliances, the bathrooms, the bedrooms and living areas, and the basement, garage, or crawlspace. Against each item you note the visible condition, whether it is a safety concern, and whether it looks major or minor, so the finished list sorts itself into what you can ignore, what you can negotiate, and what might end the deal. Treat the list as a companion to the licensed inspector's own report, not a replacement for it.
What are the biggest red flags and deal-breakers on a home inspection?
The findings that most often rise to deal-breaker level are the expensive, structural, and safety ones rather than the cosmetic list. Common red flags include signs of foundation movement such as stair-step cracks or doors that will not close, a roof at the end of its life, major or active water intrusion, outdated or unsafe electrical wiring, and a failing or long-neglected heating and cooling system. None of these is automatically fatal to a purchase, because most can be scoped and priced, but each one is a cue to bring in a specialist and to price the repair into your offer before you commit. A deal-breaker is usually not a single finding but a finding whose repair cost, once a specialist confirms it, no longer fits your budget or your risk tolerance.
What does a standard home inspection not check?
A standard inspection is a visual, non-invasive look at the accessible parts of the home, so several things sit outside its scope by design. Inspectors generally do not open walls, move heavy furniture, dig up buried lines, or run tests that could damage the property. That commonly leaves out the sewer line, the presence of radon, mold hidden behind surfaces, pests inside structures, swimming pools and detached outbuildings in some contracts, and detailed structural or specialty-system analysis. Each of these usually requires a separate specialist, which is why your check-off list should flag when the home's age or setting warrants ordering one. Reading the scope-and-exclusions section of the report tells you exactly what was and was not examined on the day.
How do I use a home inspection checklist to negotiate?
The checklist becomes a negotiation tool the moment you sort its findings by severity rather than by count. Set aside the cosmetic and minor items as your future maintenance list, then group the major and safety findings, and get a real repair number on each one, ordering a specialist where the generalist only flagged a concern. With those numbers you have four broad paths: ask the seller to repair specific items, ask for a closing credit or a price reduction to handle the work yourself, negotiate against the specialist's scoped figure, or, for serious defects, walk away using your inspection contingency. The buyers who over-reach by demanding every minor item be fixed often lose homes they could comfortably keep, so spend your leverage on the findings that actually matter.
How is a home inspection checklist different from the inspection process?
The checklist and the process answer two different questions. The process is the order of operations: keeping an inspection contingency, hiring a licensed inspector, scheduling and attending, reading the report, ordering follow-ups, and negotiating, which our companion market note on how to get a home inspection walks through step by step. The checklist is what you actually look at while you are inside the home: the roof, the plumbing, the panel, the furnace, and every room, item by item. You use the checklist during the process, most usefully while you walk the home with the inspector, so that the conversation and the written report both map onto a list you understand. One is the sequence, the other is the substance.
Should buyers make their own inspection checklist or rely on the inspector?
Both, because they serve different purposes. The licensed inspector performs the formal, standards-based examination and produces the report you will rely on for negotiation, and nothing a buyer does replaces that. Your own check-off list makes you a better participant: it tells you what to watch for as you walk the home, what questions to ask in the moment, and where the shutoffs and major systems are, which is knowledge you will use as an owner. A buyer who walks the home with a list sees a stained ceiling or a corroded pipe in context rather than as a line in a document later. Use your list to engage with the professional's work, not to second-guess it.
What is on a buyer's final walkthrough checklist before closing?
The final walkthrough is a short visit shortly before closing to confirm the home is in the condition you agreed to buy, and it is not a second inspection. Your walkthrough checklist confirms that any repairs the seller agreed to make were actually completed, that the systems that worked at inspection still work, that nothing has been damaged during the move-out, that agreed fixtures and appliances remain, and that the home is empty of the seller's belongings and debris. Run the water, flush toilets, test a few outlets and light switches, check the heating or cooling, and open and close major doors and windows. If something is wrong, it is far easier to resolve before closing than after, so raise it with your agent immediately rather than signing and hoping.
How much should a buyer budget for a home inspection and follow-ups?
A standard home inspection is commonly an illustrative few hundred dollars, paid by the buyer out of pocket, and the exact figure varies with the home's size, age, and location and the inspector's experience. Specialist follow-ups are priced separately: a sewer scope, a radon test, a pest inspection, or a structural evaluation each add to the total when your checklist flags a reason to order them. Against a six-figure purchase, these fees are small relative to what they can reveal, which is why shopping only for the cheapest inspection often costs more than it saves. Every figure here is illustrative, so confirm the current local price with two or three inspectors before you book, and set the money aside as part of your cash-to-close planning.

Hamza Hai is the editor of AbodeWave. She holds an MBA and reviews the site's articles against our editorial standards, checking that every figure is labelled for what it is, that nothing is presented as verified fact without a source the reader can check, and that the writing stays useful to a non-specialist.